How I Use Notion for Personal Knowledge Management: Distill
Disclaimer: Please note that some links in this article may contain affiliate links. This means that I may earn a commission if you make a purchase or sign up through those links at no extra cost to you. I only recommend products and services that I have personally used and found valuable.
A quick series recap…
In part one of this series, I looked at why I use a personal knowledge management (PKM) system and why I chose Notion as the tool for that system. In part 2 I discussed how I implemented the first aspect of Tiago Forte’s C.O.D.E framework; Capture into the system. In part 3 I discussed how and why we organize what’s captured within the system.
In this part we’ll review what happens when I actually consume what’s been captured and organized, distilling the most valuable insights to leverage in our own work.
I’m going to quote Tiago Forte again on this one, but in my defense this system is built on his CODE Framework.
“Every time you take a note, ask yourself, “How can I make this as useful as possible for my future self?” That question will lead you to annotate the words and phrases that explain why you saved a note, what you were thinking, and what exactly caught your attention.” - Tiago Forte, Building a Second Brain.
Capturing articles or a full transcript of a YouTube video is well and good but you might have only captured it in the first place because one particular line or quote resonated with you. Sure, highlighting that quote within the text is helpful. You can even use more advanced techniques like progressive summarization to add a hierarchy that makes it more apparent what those most valuable insights are. Ultimately, I want to be able to surface those most valuable insights without clicking into that article. Not taking the extra step here is where my systems have failed me before. Leaving your notes as highlights within an article, puts the onus on you to remember which article you got that great quote from. This completely defeats the purpose of having a second brain in the first place. As Tiago Forte wrote, ”your brain if your having ideas not for storing them.” Let your second brain do your remembering. Secondly, if those individual highlights and insights are really what have the most value, they can’t be static. These should be the individual nodes in our system from which we make connections. Connect notes from different sources to build on ideas, expand on them with new examples, share your own insights, even contradict them with a view from a different source. Connect them directly to what you’re working on, to improve your own work.
This is why a Clippings database is so integral to my system. Those individual pieces, that are most valuable, have their own page in the Clippings database so that connections can be made.
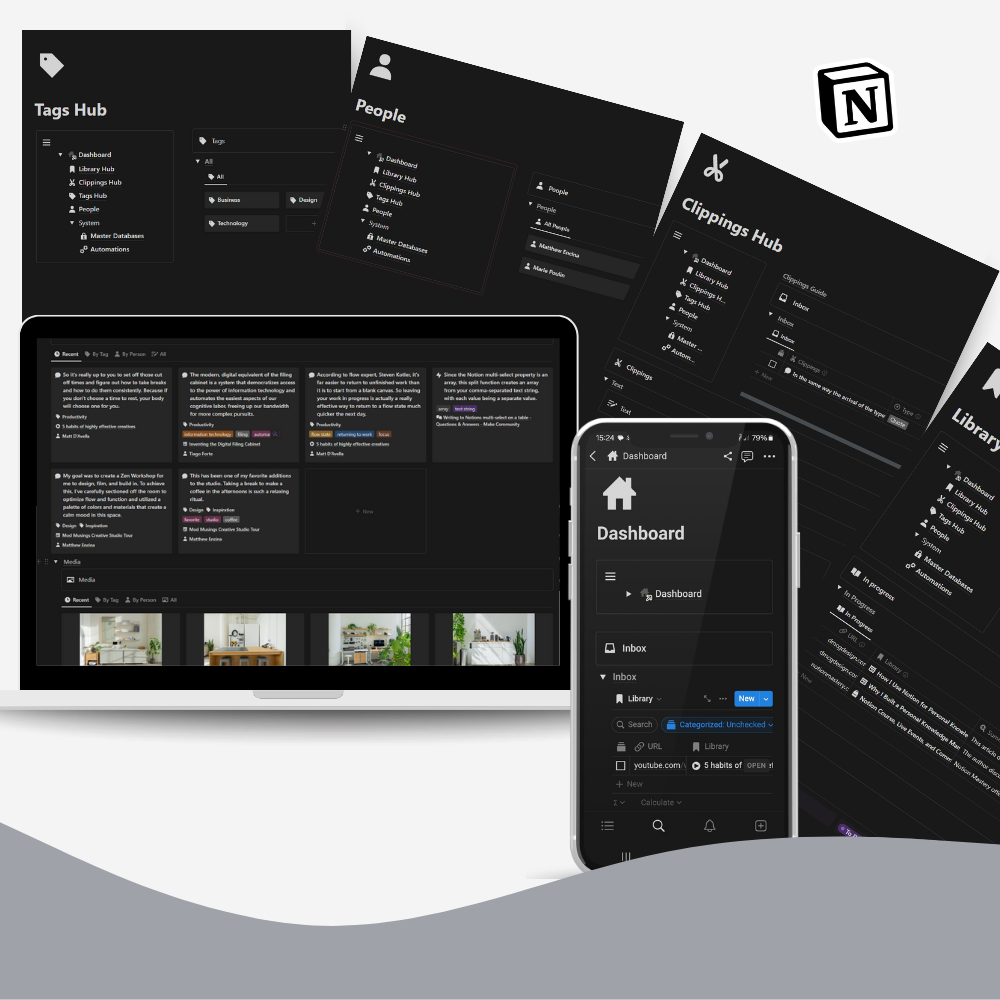
Filters for Notion button to automate Clippings to Library Relation from Notion Knowledge Management Kit
I’ve built a simple workflow in Notion for converting excerpts from sources to individual clippings. I use Notion buttons and make.com to build automations that organize and categorize those clippings. To convert text to a Clipping you can isolate the text in a single text block and simply turn it into a page in your Clippings database. The benefits of this approach is simple. While creating the page in the correct clippings database you’re also left with a link to the page directly where it’s been sourced from. Having these backlinks in place are super helpful if you ever want to refer back to the original context of a quote for example.
To turn a block into a page into in the Clippings database you can right click the block and use the turn into page in option. If you like to use keyboard shortcuts you can use cmd/ctrl + option/shift + 9 (Mac/Windows) to turn a block into a page and then cmd/ctrl + option/shift + P to move it to another database. Using the keyboard shortcuts moves the page entirely, so you don’t have the same backlink options. However you can always @ the page title to create a page link that way.
So, I’ve read an article from my library, created a number of clippings, what happens next? I’ve added a Notion button to all of my library templates that does a number of things. It checks for pages in my Clippings database that are not Categorized, i.e. the categorized checkbox is unchecked (more on that in the organize part of this series) and does not currently have a relation to the Library database (the clipping’s original source). Once those pages are found, the current Library page is added as the Library relation for each clipping. The Library page is then marked as archived. So how this looks like within my workflow is; I consume the content within it’s page in my Library database. I convert valuable insights to Clippings. I press a button to relate those Clippings to the Library page I am viewing, and I archive the Library item.
The next step to the process is a little more convoluted and but there’s also an easier workaround which I’ll explain too. The Clippings and Library databases have their own relations to other databases in my workspace. Like the People, Tags and Project databases, for example. About 90% of the time these relations will be identical. The clipping will be attributed to the author of the article and the general theme will be similar so they fall under the same tag. So why use 2 separate relations? You can use one relation and simply create a rollup for the other database. Problem solved. That’s true, except for the 10%. The 10% of the time where you want to attribute a quote to a new guest on the podcast - not the host. Or, the 10% of the time where the clipping inspires an idea for a completed unrelated project to the one you were researching. That 10% is a real pain. It more than doubles the amount of time that it takes to process clippings and library items because there’s separate relations. That’s why I’ve automated this step using Make. I built an automation that checks my clippings inbox (checks for uncategorized clippings). Finds their Library relation (which was added using the Notion button automation) and creates the same relations. So the clipping is attributed to the author and the tags are the same. Great! For 90% of the time I don’t need to do anything more, I can just categorize the Clipping in my inbox and it’s done. For the 10% of the time where there’s going to be a difference between the clipping and it’s source, I have the freedom to edit it. That’s because we’re using a separate relation property as opposed to a rollup of the library relation. With a pretty basic automation, I’ve reduced the time it takes to process this by 90% and still have the freedom for that customization where it mattes. Automations are cool.
Now that I’ve consumed a, it’s automatically archived within my library database (after clicking the automation button). The clippings are processed and I can rely on my system to know that they’ll surface in the right context. They’ll appear on the right project page, under the right tag page etc., so I don’t constantly need to refer back to the original source to find them. That is not to say, I never go back to my archive. Of course I do, because it’s just that, an archive. An archive of personally curated content over years and years. It’s a treasure trove. It’s important to not fall in to the trap of consuming content in your system and letting it fall into the digital abyss. It’s why I very deliberately called the status option in Notion “Archived” and not ”Done.” Nothing in your library is ever “Done”, it’s just waiting to be exactly what you need for your next project. The archive is alive, it’s not a graveyard.
Sometimes it can be more obvious than others to refer back to your archive. For example, if I want more context for a clipping I can refer back to the source and view the quote exactly within it’s context. For the less obvious times, I try to leave myself reminders. Say, if I start a new project and the first phase is to do some additional research. My initial instinct is to jump to Google and dive into searching for content on that topic. But it’s very possible I’ve already done a lot of that work in time gone by. So, I have a pre-built reminder (a sub-task) to my project research task to refer back to my archives and see what’s in there already.
That’s the long and short of it. If you’ve followed along by PKM journey in this series hopefully you’ve picked up something on why a system like this can be valuable. As well as hopefully some tips on how best to Capture, Organise and Distill the information within your system. If you’re looking to build your own system, all the information out there can be overwhelming. My system very much evolved as my knowledge of PKMs, and more importantly my understanding of what I needed from a PKM grew over time. Just get started, then iterate. If you’re not as interested in the architecture of the system or you don’t want to start with a blank canvas you can integrate my system into your Notion workspace from the template links below.
The last part of the series, on using a PKM system to help your own Expression will come soon. If you’re interested in a system ready to integrate your PKM with your actions you can take a look at our integrated Knowledge and Project Management Kits in our bundle product.

